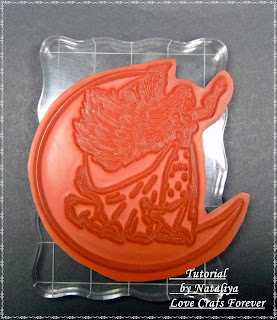
Today i like to show you my discovery, on how to stamp your rubber stamps prefect every time. Here is my favourite of all time Sweet Pea rubber stamps. As you see on this photo, i didn't stamp so well, and i try so many times, and same spots was missing. And if some of you has a bad hands (i injured my by over working out too hard lol), then you know how it's painful can be.
Tip #1
 So after thinking, i try to stamp on this cute (my old) computer pad. I'm using this pad now for shaping my home made flowers, and it's work awesome. I think this pad need some wash. lol
 Ok, back to my tutorial. So the softness of this pad, let me not to push too hard on my block, and at the same time, ink goes to that spots where you missed before.
 And here, as you can tell, how much better image was stamped
 Tip #2
Some of your stamps could be to big for your block, like on this photo. What will you do now???? Please don't run to the store and buy bigger one.
 Here is my idea. Grab a CD case, pull out label from the front of your case, and stick your gorgeous stamp on this CD case
 Open and stamp, by pressing with your fingers all over the stamp area.
 Woo-Hoo! You have now another prefect image.
 I really hope this tips will help you, my lovely Friends, and you will have never bad stamped images. I used StaZOn Black ink pad. And now i am ready to colour , and have fun, by making something beautiful. Hugs Nataliya


Thank you so much for a great tips :) I have use mostly digi- images, but for text I can also see that sometimes it is not so good, so this is for big help, purhaps I try images also now :)
ReplyDeleteHugs Lill
Thanks for the very useful info! It will save me papers and ink by following your tip. ;)
ReplyDeleteHi Sweetie! Thanks for the fabby tips. I have struggled with the same problems and now i`ll have to give this one a try. Hugs...Mona
ReplyDeleteThanks for sharing such great tips!
ReplyDeleteCarri~abusybee
www.doubleclickconnections.blogspot.com
oh hun you are always full of super ideas and these are great tips,hun hugs cherylxxxxx
ReplyDeleteGreat tips Nat! Will give these a try.
ReplyDeletexoxo Marjo
Terrific alternatives Nat, thanks for stopping by today and good luck with the hop! The yellow and pink flourishes are stickers by Jolee
ReplyDeleteLove the sweet pea stamps and have such a problem getting all their fab detail to come through. I've tried my quilting pad. It worked better than it had but not perfect still. Will definitively try this. Thank you for the tips
ReplyDeleteGreat tips, thanks for sharing!! I have the same problem (the first) and now I know how do!! Your Sweet Pea stamps are fabulous!
ReplyDelete